
Aging wood the right way is essential for maintaining the look, color, and finish of your woodworking projects. In this comprehensive guide, you will learn about the different stages of wood aging and the best methods for achieving the desired look. You’ll also learn about the risks associated with aging wood incorrectly, as well as the different types of wood finishes that you can apply to age wood. With this information, you will be able to age wood the right way every time!
What Is Aging or Oxidation And Why Does Wood Change Color As It Ages?
Wood aging or oxidation is a process that happens as a material loses its original color and becomes duller in appearance. It’s a natural process that happens as the air and water seep into the wood and cause it to shrink, contract, and discolor. The deeper the wood layer, the more it will change color over time. Aging or oxidation is the process by which a material loses its original color and becomes duller in appearance. To keep your furniture looking its best for years to come, protect it with a finish or coating that stops age from causing damage.
Now, the main question for this article today is:
How to age wood? To age wood one can use Steel Wool, Tea, and Vinegar Method, Staining Method, or Sun Bath Method. There are some other ways to weather wood the right way. Read on to know all the details about all the ways to age wood.
Aging Wood Using Steel Wool and Vinegar
Aging wood using steel wool and vinegar is a great way to improve the look of your furniture. It’s a simple process – just apply steel wool to a damp cloth and scrub away the dirt, then rinse it off. Once the wood has been treated, allow it to dry fully before applying any finishing products or paint. Vinegar can be used in place of water if you want a more concentrated solution. This process is great for wood that is starting to look aged or dusty, or if you just want to clean it up a bit. It’s a great way to restore the look of your furniture and make it look new again!
Know What Happens when Steel Wool and Vinegar interact
When it comes to aging wood, steel wool and vinegar are two of the most effective tools in the homeowner’s arsenal. steel wool removes the oils and dirt that can accumulate on aging wood, while vinegar helps to preserve the color of the wood. Keep a bowl of vinegar and steel wool nearby to keep your wooden items looking their best.
Create the steel wool-vinegar solution
There are a lot of ways to clean aging wood, but steel wool and vinegar are the most effective. Steel wool removes the oil and dirt while vinegar helps to break down the wood fibers. Apply the solution to a cloth and wipe the surface clean. Repeat as necessary until the wood is clean and shining.
Prepare your wood
A lot of homeowners love the look of aging wood, but don’t want to spend hours sanding and refinishing. There is a solution! By using steel wool and vinegar, you can prepare your wood for aging in just a few short steps. First, make sure the wood is free of any oils, waxes, or polish. Then pour vinegar onto a cloth and scrub the wood until all the dirt is gone. Finally, use steel wool to remove the surface dirt and oils. This method not only gives your wood an aged look but also cleans it of any harmful chemicals. So go ahead and give aging wood a try – it’s definitely worth it!
Make a tea stain
There are times when aging wood naturally starts to stain. If this happens, don’t panic! You can use steel wool and vinegar to get the stain out. Dab steel wool on the stain and then apply vinegar. Let the mixture sit for a few minutes until the stain is gone. Repeat if necessary until the stain is gone. Wash the area with soap and water to remove the stain.
Apply the steel wool-vinegar solution
Aging wood can look aged and dull due to the natural oils and waxes that are present in the wood. These oils and waxes can be removed using steel wool and vinegar solution. Apply the solution regularly to get good results, and remember to test it on a small area first before applying it to the entire piece of wood. If you find that the solution is not working as planned, repeat the process every few months or so.
Finish the wood
Aging wood using steel wool and vinegar can help you finish the wood and give it a new look. 1. Wipe the wood with a clean cloth dipped in vinegar. 2. Apply a thin layer of steel wool to the surface and rub it vigorously until the dirt is gone. 3. Rinse off the wood with water and dry it off completely before applying your finish of choice.
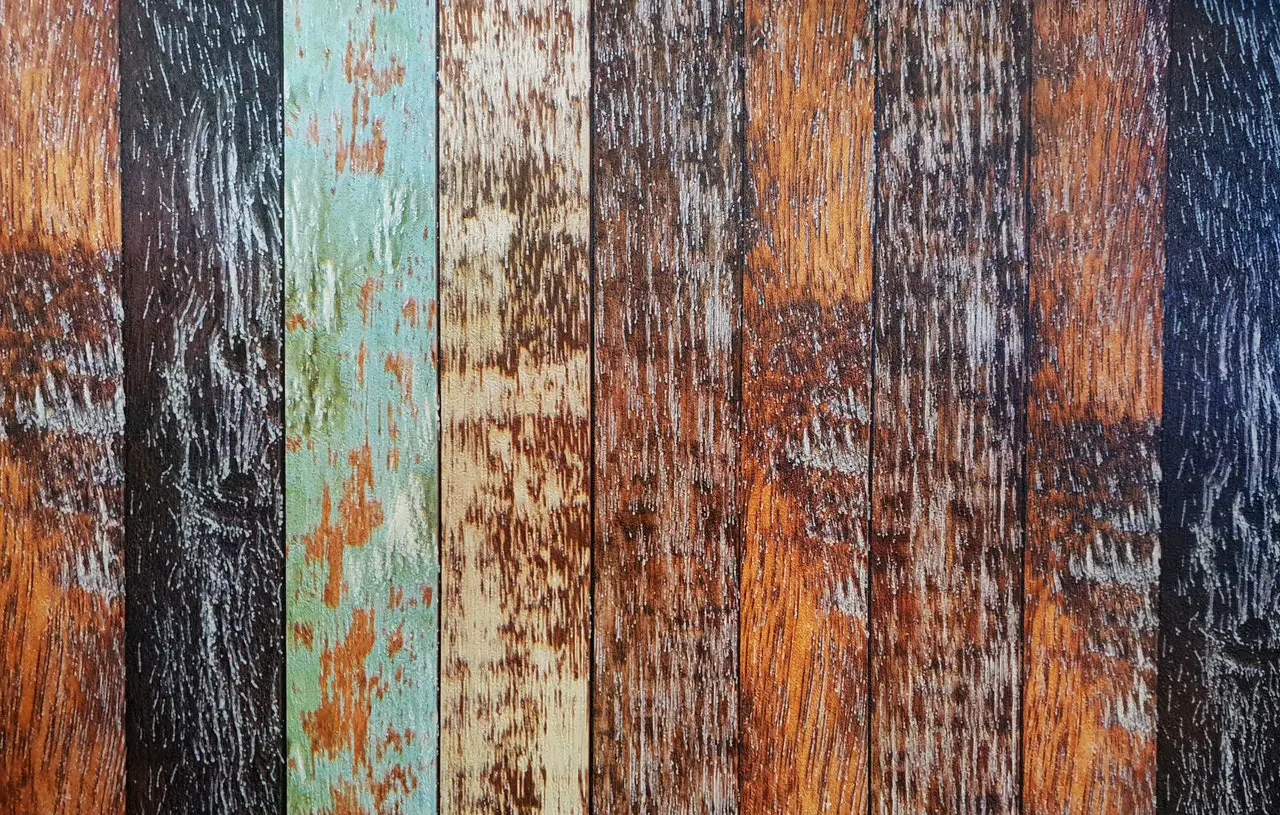
Aging Wood Using Stains and Paints
Aging wood can look aged and tired even after years of use. However, with the help of stain and paint, it can look new and beautiful again. Follow the manufacturer’s instructions carefully when applying the stain or paint, as making a mistake can result in a poorly finished project. There are many different stains and paints available, so it’s important to select the right one for your project. aging wood can be beautified using any of the many stain and paint options, so have fun trying out different ones and see which one suits your wood the best. A well-done project will give your aging wood a new look that will last years!
Apply a coat of sun bleach stain to your wood
Aging wood is a natural process that happens to all wood over time. However, there are a few ways to keep your aging wood looking new and healthy. One of the most common methods is to apply a coat of sun bleach stain. This stain will help to preserve the wood and keep it looking new, while also inhibiting the growth of mold and fungus. Always use proper safety equipment when working with stains and paints – wear gloves, a face mask, and eye protection! Apply a liberal coat of stain to the wood, let it dry completely, then apply any desired top coat. If you’re looking for an easy way to age your wood without having to do any hard work, sun bleach stain is definitely the way to go!
Add a layer of early American stain
Adding a layer of early American stain to aging wood can give it a rustic look. Different types of stains can be used, such as wood stain, red paint, and barn paint. The color mixture you use is up to you – experiment to see what looks best on your wood. Apply the stain and paint as usual – be sure to wait until the paint has dried completely before touching it up. Remember to sand the stain off once it has dried for the perfect rustic look!
Make a rustic stain
Aging wood the rustic way is a great way to add character and patina to your furniture. There are many different stains and paints you can use to achieve the look you desire, and all of them require minimal preparations. Be sure to test a small section first to make sure the stain or paint will work with the wood you have chosen. Once you are sure it will work, apply the stain or paint using a brush or sponge. Let the stain or paint dry before using your aging wood project.
Apply the rustic stain
Aging wood using stains and paints is the perfect way to give your furniture a rustic look. There are different types of stains and paints that will work best for different types of wood, and the rustic stain is the perfect choice for aged wood. Once you have applied the stain and paint, give your wood a 72-hour dry time before using it in your home. Follow the instructions on the labels to make sure you get the most out of them. As aging wood becomes more popular, there are more companies producing stain and paint products specifically designed for aging wood. So don’t be afraid to experiment with different stains and paints to get the look you want for your old furniture!
Creating Crackles in Your Wood
Woodworking is all about creating beautiful objects from scratch. And the best way to achieve this is by adding crackles to the wood. Allow the wood to dry completely before using a creative tool such as glass etching sandpaper or steel wool on top. There are a few tips that will help you get started. First, clean the surface of your wood with a soap and water solution. Next, apply oil or varnish to the surface of your wood. Finally, start etching or sanding the wood to create the desired crackles. Be patient and take your time; you’ll be able to create some beautiful pieces of woodworking furniture in no time!
Paint your wood
Wood is a natural material that has the ability to age beautifully, given the right treatment. Whether you want to add a splash of color or just give your wood a new lease of life, painting it is the perfect solution. There are many types of paint available on the market today, each with its own unique properties. Be sure to test out different colors on a small section of the wood first to get an idea of what you want. Once you have chosen the paint, use a brush to apply it evenly to the wood. Don’t be afraid of making mistakes – scrapes and muddles are part of the process! Once the paint is dry, use a sandpaper block to smooth out any bumps and imperfections. Voila! You have successfully painted your wood!
Apply white school glue
Wood can look plain and boring if you don’t add any character to it. One great way to do this is by using white school glue to create cracks in your wood. It is easy to use, just apply it to the desired area and leave it for a few minutes to set. Once the glue has been set, you can finish off the cracks with a wood polish or sandpaper if you like. Not only does this look great, but it also adds extra strength and durability to your wood furniture. So why not give white school glue a try today?
Add a second coat of paint
If you’re looking to add some life to your wood and make it look more polished, try applying a second coat of paint. Be patient – the cracks will eventually disappear with time. The key is to use the right type of paint and apply it in the right way. If you have cracks in your wood, adding a second coat of paint can fix it. Remember to sand the surface of the wood before painting so that the paint adheres better and doesn’t get absorbed by the existing finish.
Wait for the crackle effect to start taking place
It might be hard to believe, but if you sand down wood too soon, the wood will look fake and plastic-y. The crackle effect only happens when the wood is completely dry – once it has been properly sanded down, you can finish off the job with a coat of paint or varnish. It is important to wait for the crackle effect to start taking place before you begin sanding down the wood in order to get the most authentic-looking finish. If you sand down the wood too early, the wood will look dull and rough. So patience is key when it comes to achieving that perfect crackle effect in your wood!
Distressing Wood
There’s something about distressed wood that just makes it look so darn cool and stylish. Whether you’re a rustic style lover or you just want something new and different in your home, distressed wood is the perfect solution. There are many different styles of distressed wood available, so finding the perfect piece of furniture is easy. Plus, the process of distressing wood furniture is simple and easy to do. You can either do it yourself or ask a skilled woodworker to help you out. Not only is distressed wood a great way to update your look, but it’s also an affordable way to add personality and life to your home. So go ahead and distress your wood furniture!
Distress wood with nails in a sock
Distressing wood is a great way to add character and interest to your pieces of furniture. By using nails in a sock, you will prevent the nail from going all the way through and making a hole in the wood. You can also distress other materials by holding the item down with nails while you drive them into the material. It is best to use a sock that is tight enough so that the nails don’t move around but not too tight where it hurts your hand. Use a sock to hold the nails in place while you drive them into the wood. Once you have distressed the wood, be sure to seal it with a coat of polyurethane or varnish to keep it looking new for years to come!
Hit the wood with a hammer or mallet (Grinder is a good option, see the video also)
Wood is an excellent material to use in art and design. By hitting the wood with a hammer or mallet, you can create a distressed look that is perfect for unique and beautiful pieces of art. This process not only creates an aged look but also enhances the uniqueness of the piece of art. It can be used for a variety of purposes, including décor, furniture, and even musical instruments. So if you’re looking for an interesting way to add character and beauty to your home, then Distressing Wood is the perfect solution!
Rub the wood with sandpaper (See the video)
If you’re looking for a quick and easy solution to distressed wood, sanding might be the answer. However, be careful not to scratch the wood too much – this will only make the problem worse. If the wood is really distressed, rubbing it with sandpaper can help to smooth out the surface. Use a light touch and be patient – it might take a few rounds of sanding to get the desired effect.
Make “wormholes” with drywall screws hammered into a 2×4
Distressing wood is a great way to address water leakage, cable entry holes, or any other type of problem with your walls. It requires some DIY skills but is relatively easy to do – can be done in just a few minutes. Once you’ve completed the job, use screws to create “wormholes” in the drywall, which will stop small objects from getting through the wall. This DIY project is perfect for people who are short on time and want to get emergency repairs done quickly and easily.
Bleach with a Sun Bath
Bleach is a great way to clean surfaces, but be careful when using it. En bathing in direct sunlight, use sunscreen, and wear protective clothing. The bleach can be used to clean most surfaces, but it’s important to follow the instructions that came with the product. For example, don’t use bleach on wood or metal, and be sure to rinse the area thoroughly after using it.
Use Pioneer Wood
If you’re looking for a unique wood option for your furniture, look no further than Pioneer Wood. Made from recycled materials, this wood is environmentally friendly and has a natural grain pattern that makes it a great choice for flooring accents or furniture accents. You can even use pioneer wood to create your own outdoor furniture! Not to mention, its sustainable properties make it a great alternative to traditional wooden furniture. So why not give it a try? You won’t regret it!
Dissolve the powder in water
Do you often find yourself without the right ingredients to make the dish of your dreams? Pioneer Wood is the solution to all of your cooking woes! This versatile powder can be used as a flavor enhancer, food stain remover, and much more. Simply dissolve the powder in water before using it, and you’re good to go. Additionally, Pioneer Wood is environmentally friendly as it doesn’t require any harmful chemicals or additives. So what are you waiting for? Start cooking with Pioneer Wood today!
Wait Time Depending on Type of Wood
There’s no need to worry about the aging process of Pioneer wood – it will only get better over time and with the natural weathering process. Pioneer wood is perfect for any indoor use, from furniture to cabinets. In fact, one of the best things about this kind of wood is that it doesn’t stain or take on odors as other wooden products do. So if you’re looking for a stylish and durable piece of furniture, look no further than Pioneer wood.
Use Baking Soda (See the video)
Baking soda is a versatile and essential ingredient for the kitchen. Not only is it a great way to de-clog your drains and clean surfaces, but it also has a unique ability to eliminate odors. Simply sprinkle baking soda on the clogged area, wait 10 minutes, and then rinse off with water. Keep in mind that baking soda is a great all-purpose cleaner, and can be used to clean everything from the stovetop to the fridge. So, don’t be afraid to add this humble ingredient to your arsenal of cleaning supplies!
How to cheat to get that aged wood look
There are many ways to cheat your way to the aged wood look. One method is to seal your furniture after painting it. If you want to go the extra mile, you
can even dye your furniture pieces! There are many options available, so it’s up to you which one works best for you. One way to cheat and get that aged wood look is to use water-based paint. If you love the look of barn board walls, use Tempaper, a removable wallpaper that sticks to any smooth, painted, or primed surface. It peels off easily and it won’t damage drywall or leave messy glue behind. Watch the installation video at tempaperdesigns.com. Plus, check out the pros and cons of removable wallpaper. So, what’s stopping you from aging your furniture the old-fashioned way? Get creative and start aging your furniture today!
How Does This Oxidation Solution Compare To A Store-Bought Stain?
If you’re looking for an oxidation solution that’s better than the ones you can buy at the store, look no further. These solutions are a preferred choice of those who care about their clothing and belongings. They’re made with bleach, which kills any harmful bacteria or yeast that may be present. Additionally, oxidation solutions are a great option for removing stains from clothing and other fabrics. As opposed to store-bought stain removers, oxidation solutions aren’t harsh on the clothes or fabric they’re used on. What’s more, oxidation solutions are made with natural ingredients and are gentle in the environment. So not only are they effective, but they’re also eco-friendly.
Weathered Gray Wood Stain
Are you looking for a stain removal solution that is better than the ones you can buy at the store? If so, oxidation solutions may be the perfect option for you. Compared to store-bought stains, oxidation solutions work better because they remove more of the original color. Furthermore, they are a great way to restore faded or weathered colors in your home. Oxidation solutions can be sprayed on, mixed with water, or mixed into a paste and applied as a stain. It’s important to test the product in an inconspicuous area first to make sure it will work well on your fabric or surface. Finally, always wear gloves while using oxidation solutions to prevent skin irritation.
Weathered Wood Accelerator
Looking to clean the wood on your furniture or any other wood surface in your home without resorting to harsh chemicals? Look no further than this oxidation solution. It is safe to use on any surface and comes with a handy spray bottle for easy application. Plus, unlike store-bought stains, this solution quickly removes all the dirt, oils, and stains from the wood – leaving it looking like new again. So why not give it a try today? You won’t be disappointed!
Aged Wood Accelerator
Stains and scratches on wood can be a pain to get rid of. Fortunately, there is an easy solution that you can use at home – an aged wood accelerator. This solution traps and neutralizes the free radicals, which stops the process of oxidation from occurring. This allows the wood to retain its natural color and texture, reducing the need for painting or staining. Oxidation is the process of oxidation where electrons are stripped from molecules, leading to the formation of free radicals. By using the aged wood accelerator, you can prevent these harmful molecules from forming, and preserve the look and feel of your wood furniture, flooring, and cabinets.
How Does Finish Affect The Tone Of The Stain?
When stain stain stain, the final result is often affected by the finish of the stain itself. Water-based finishes will tend to be more effervescent and light in color, while oil-based finishes will leave a darker hue on porous surfaces. To achieve the desired tone, test different finishes on a small area before staining an entire floor or room. As a finishing note, remember that the finish of a stain will affect the color that it leaves behind. So, if you’re looking for a specific shade, make sure to test the stain on a small area first to get a better idea of the final look.
Water-based polyurethane (Varathane Ultimate blend, satin finish)
When you want a beautiful, long-lasting finish on your woodworking projects, the best choice is water-based polyurethane. This type of finish is low-VOCs and offers a satin finish that looks great and is easy to care for. To get the perfect finish for your project, use a clear Satin Polyurethane topcoat and then seal with an oil or water-based stain (such as Varathane Ultimate Wood Stain). As long as you use the right polyurethane and stain, finishes will vary depending on the wood type and the condition of the wood. But all of them will be relatively low- VOCs. So if you’re looking for a durable, easy-to-apply finish that won’t harm the environment, water-based polyurethane is a perfect choice!
Oil-based polyurethane (Varathane Ultimate blend, satin finish)
If you’re looking for a wood finish that will give your wood furniture a natural look and feel, look no further than Varathane Ultimate blend. This finish is available in two colors – natural and espresso – and can be used on most types of wood. It also means that the stain will not pull or crack when you wet it down, which is great for areas with high water usage (like kitchens). The stain looks more like wood than a traditional oil-based polyurethane finish would, which gives it a rustic look and feel.
Marine spar varnish (Total Boat Gleam 2.0, satin finish)
When it comes to woodworking, the finish is key. It can make or break the look of your project and can even change the tone of the stain. So be sure to choose the right finish for your boat and stain it, and test it out first to make sure it reacts the way you expect it to. Some finishes, like marine spar, vanish, will protect the wood from water damage, fading, and rot. The satin finish will help the marine spar varnish to a total boat Gleam 2.0 finish. This will give your boat a glossy look that will stand up to wear and tear. And last but not least, be sure to choose a finish that matches the color and style of your boat – different finishes look great on different boats!
Tung oil (Watco)
If you’re looking for a stain that will protect the wood from water damage while still providing a nice, dark finish, look no further than tung oil (Watco). Tung oil is a type of oil that coats the surface of the wood and makes it difficult for the stain to reach the wood core. As a result, you can still use Watco if you want a dark finish – just be aware of the time it will take to fade away. This will result in a darker stain that takes longer to lighten up. So if you’re in need of a stain that will provide long-term protection from water damage, tung oil is the perfect solution for you.
Spray lacquer (crystal clear, satin finish)
There are many lacquers on the market today, each with its own unique features. One of the most popular types of lacquer is the spray lacquer. This type of lacquer comes in two varieties – the satin finish and the matte finish. The stain finish is best for areas that will be seen frequently, such as the kitchen counter. It has a high-gloss finish which makes it easier to clean, while the matte finish prevents the stain from spreading and fading. If you have a tough-to-clean surface, choose a lacquer with a satin finish instead of a matte finish.
How Does This Oxidation Solution Look On Different Wood Types?
If you’re worried about the color of your wood, we’ve got the solution for you! Our oxidation solution is designed to help wood of all colors look its best. Oxidation is a natural process that happens to all wood over time. The color of the wood will depend on the type and severity of oxidation. Red oak typically oxidizes more than other types of oak, creating a darker color. So, if you’re looking to keep your wood looking its best, give our solution a try!
How long does it take to age wood?
Aging wood is a process that happens over time as a result of natural processes or treatments. For example, treated lumber will age faster than untreated lumber due to exposure to chemicals or other treatments. Keeping the wood dry is also important, as it doesn’t absorb moisture and begins to decay. Wood can take anywhere from a few weeks to several years to the age, depending on the type and condition of the wood. aging wood is a process that happens over time as a result of natural processes or treatments. For example, treated lumber will age faster than untreated lumber due to exposure to chemicals or other treatments. Keeping the wood dry is also important, as it doesn’t absorb moisture and begins to decay.
Finishing Touches for Aging Wood the Right Way
Aging wood can be a beautiful addition to any home. By taking the proper steps, you can help the wood aging process look natural and add character and beauty. Cleaning your wood regularly will help prevent the development of problems like dry rot, water damage, and warping. For added protection, seal the wood with a finish or sealant. aging wood can also suffer from moisture damage, so be sure to take proper precautions. aging wood is a natural process, so enjoy the process and don’t worry about the small details!
How do you determine the age of wood?
There’s nothing like a beautiful piece of wood to add character and warmth to any room in the home. However, the aging process of wood can take a toll on its look and performance over time. That’s why its important to take care of wood the right way from the start. For example, older wood will likely have undergone more wear and tear, so it’s important to treat it accordingly. To determine the age of wood, look for the species and identify the identifying marks. Once you have that information, subtract 20 years from the number to get your estimated age in years. So, if you have a piece of wood that was made in 1987, the age would be 97 years. wood is a natural resource and has many qualities that make it appealing to the eye, from its grain patterns to the different colors it can exhibit. So, don’t be afraid to use wood in your home – aging it the right way will result in a beautiful piece of furniture that will look
What are the different types of wood finishes?
Choosing the right wood finish for your home or business can be a daunting task. But don’t worry, we’re here to help! Wood finishes come in a variety of different types, each with its own unique properties and benefits. Some of the most common wood finishes include high-gloss, lacquered, and treated wood. Depending on the type of finish you choose, you can achieve a variety of looks and effects. Carefully consider the finish that best suits your needs and you’ll be on your way to a beautiful home!
Which woods should be aged?
When it comes to wood, there is a lot of confusion and misinformation out there. That’s why it’s important to experiment and try different woods in your cooking to see what you think. As for aging wood, there is no one right answer – it all comes down to personal preference. Some people believe that all wood should be aged for a richer flavor, while others think that only select types of wood should be treated this way. The best way to find out is to try different woods in your cooking and see what you think!
How long should I be aging wood?
When it comes to aging wood, there’s no one-size-fits-all answer. However, if you’re looking to add a new layer of wood to your home, it’s best to wait two years after the last frost. Furthermore, aging wood helps reduce moisture levels and stops insects from eating the wood. Lastly, keep aging wood in a cool and dry area away from direct sunlight or heat sources.
How long should I age wood?
Aging wood is the process of allowing the wood to age naturally and develop its natural beauty. While aging wood isn’t a new phenomenon, the process has become increasingly popular due to the popularity of rustic décor. Making sure to use the right quality product and following the instructions carefully will result in beautiful, long-lasting aging wood. If you’re looking to aging wood for a specific look, don’t cut it too short – you’ll end up with disappointing results. aging wood for the right amount of time will produce beautiful, long-lasting results.
What are the potential risks associated with aging wood?
Aging wood can be a risky proposition, especially if you’re not aware of the potential risks. dry, cracking surfaces that can give way underfoot, splitting when working with aged wood, and the risk of rot or decay. Always be sure to use the proper safety equipment when handling old lumber, and be sure to take all the precautions necessary to avoid accidents. aging wood may also contain dry woody material that can create an unpleasant odor.
Conclusion
Aging wood the right way is essential for creating the look of aged wood. By following the steps listed above, you can achieve the desired look in a shorter amount of time. Make sure to read the entire blog for detailed instructions and helpful tips. As wood ages, it will naturally change color and develop cracks and distresses. By following the steps outlined in this blog, you can achieve the aged look that you’re looking for.